This is a replacement firmware for the original version (V1) of the EleksTube IPS clock. It uses the WiFi support that your clock already has to sync the time with the internet and to provide an easy way to configure the clock and change the display:
- It can display the time, the date or a weather forecast.
- It synchronizes the time with NTP so it is very accurate.
- It automatically handles timezone and DST conversions.
- All clock configurarion is done using a web interface.
- Set the timezone information
- Set the hours the clock is on
- Switch between a six digit clock showing seconds and a four digit AM/PM display
- Enable/disable leading zeros
- Switch the display between time, date and the weather
- Set the date format
- Set the backlight effects and colors
- Upload, delete and select the images used for the clock display
- Configure the weather forecast
- Upload, delete and select the icons used for the weather display
- Configure a screen saver
- Select a clock face/weather icons using the buttons on the clock (see user guide for details).
- Connect to a MQTT broker
- Interface with Home Assistant Discovery, allowing control of brightness and screensaver activation.
- There is also a tool to convert images in to a format that can be displayed on the clock
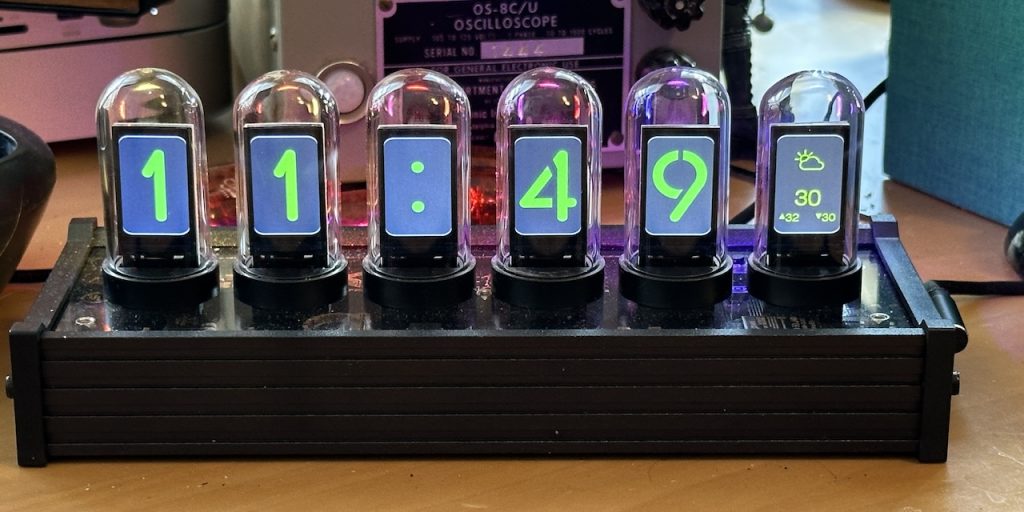
This image shows the clock running in 4 digit mode with weather:
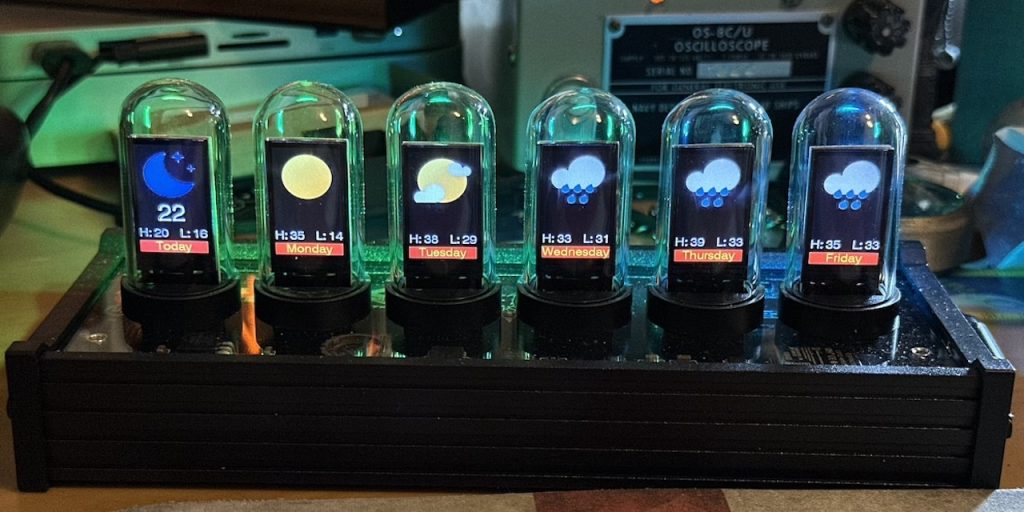
This shows a weather forecast:
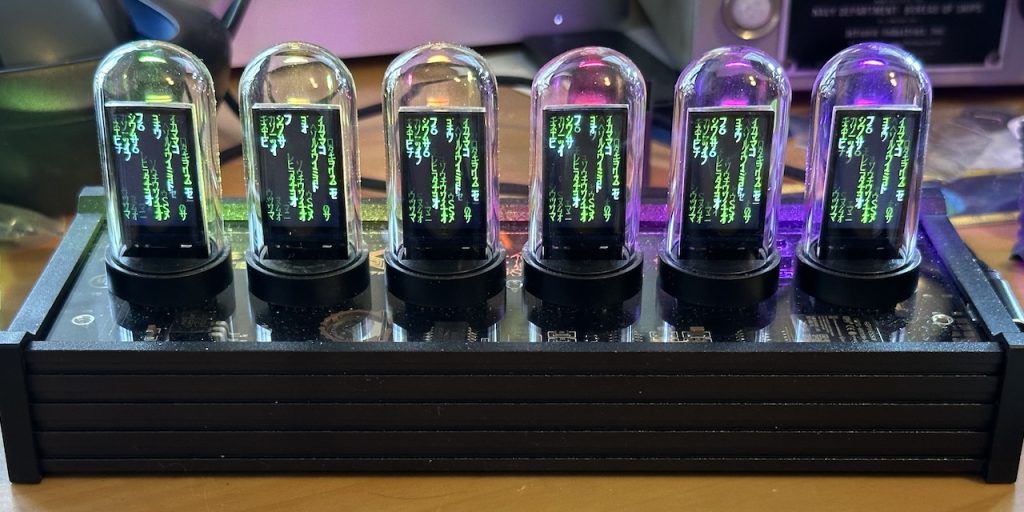
This shows the digital rain screensaver
Additional Images
The project is hosted on github. There you will find many additional clock faces that can be uploaded and one additional set of weather icons.
Documentation
See the wiki for detailed information on how to build, install and use this firmware.
- Installation takes you through backing up the original firmware, building the custom firmware and uploading it to the clock. Note you can install/update the firmware directly from this web page if you are using Chrome, Microsoft Edge or Opera (but you can’t make a backup of the original firmware this way).
- Connecting to WiFi takes you through getting your clock connected to your router so it can sync the time with NTP and you can configure it using a web browser, however if you use the install button below, you can set up the WiFi connection directly from this page.
- User Guide shows you how to configure and control your clock.
- Hardware Modification details a mod that you might want to make to your clock, but only if you are comfortable wielding a soldering iron.
- Image Collections tells you how to prepare new clock faces and weather icon sets so that they can be uploaded to the clock and used.
Credits
Original documentation and software from EleksMaker.
This code wouldn’t exist without the work done by the people on this reddit discussion.
Installation
- Go to this page to install this firmware for the EleksTubeIPS V1 clock
- Go to this page to install this firmware for the Si Hai clock
- Go to this page to install this firmware for the NovelLife SE clock
- Go to this page to install this firmware for the Punkcyber clock (aka the RGB Glow Tube DIY Clock)
- Go to this page to install this firmware for the IPSTube clock (such as the H401)
Outstanding work!
I was trying out the IPSTube version, but got no display using the 1.6.0 version. I looked and found that the Global Defines.h does not have the CSSR pins defined like the other clocks. This would explain why the displays never initialize. I don’t have any knowledge of what pins are used, so will be looking forward to your next iteration. Thanks so much for your efforts.
I would just like to confirm that you in fact flashed the IPSTube version, because someone else said they got a file not found error when they tried to do that.
The IPSTube clocks apparently don’t use a shift register to select the display that should be updated – instead each display enable/disable pin is directly controlled by its own pin on the ESP32. As I don’t have this version of the hardware myself, it is quite possible there is a bug there, but it is also possible that the clock thought the display should be turned off – the firmware has a configurable on/off time for the display. The default off period is midnight to 6am, but the clock needs to connect to the internet first to get the actual time, and then you need to set your timezone, so even if it wasn’t between midnight and 6am where you were, the clock could have thought it was.
This is amazing!
Managed to install this firmware on my IPStube clock, only problem it that the most right screen fails to initialize, other than that, works beautifully.
The web interface is amazing btw!
*Also, could you add support for the bottom NeoPixels on future versions? Thank you so much and keep you good work up!
Thanks. Could you create an issue at https://github.com/judge2005/EleksTubeIPS with a photo of your clock running my firmware?
Sure will do!