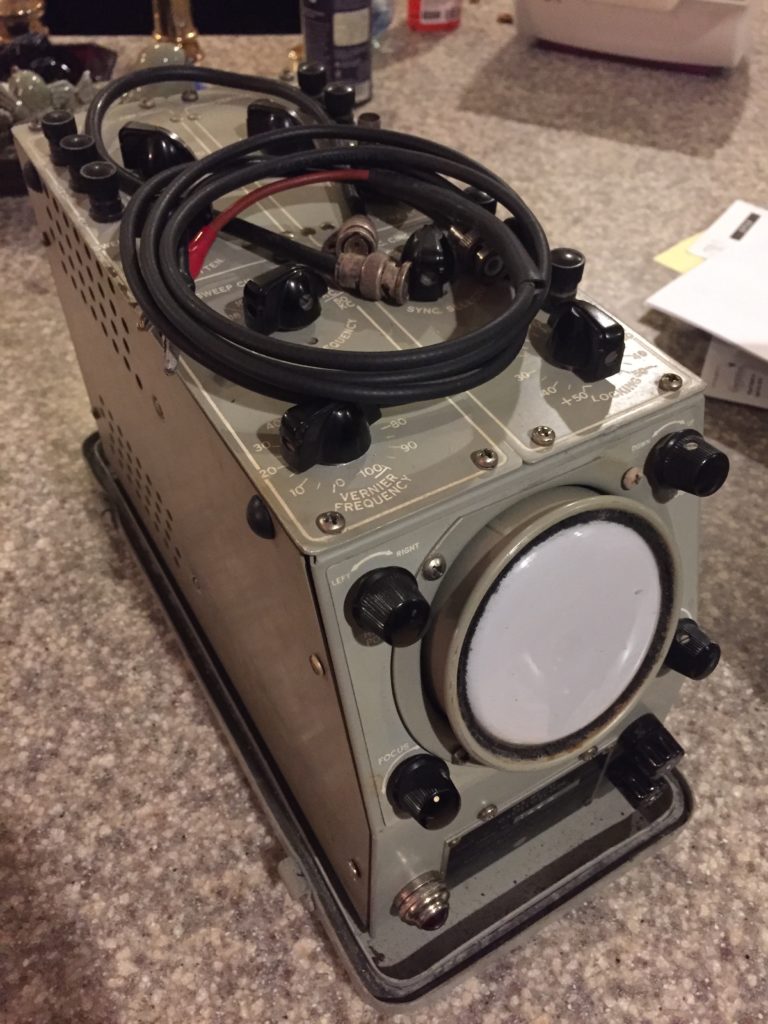
So I had a functioning prototype (see the end of Part 2), but at about this time I bought an old oscilloscope:
So I started looking around for oscilloscope clock kits and eventually I hit this site (which is an overall fascinating site). That site had a page that introduced me to voltage regulator (VR) tubes. He was using two tubes called 150C2 (aka 0A2) to provide +150V and +300V. Now the great thing about VR tubes (for me) is that they are also cold-cathode tubes – i.e. they contain some mixture of noble gasses, and they glow. It looked like I could easily produce a regulated power supply using these tubes, but of course there was a catch – or several in fact:
- These are like nixies or any other neon tube – they need to be current-limited. The 0A2 will take a maximum current of 30mA. The way that Grahame was using them was to tap off the required voltage after the current-limiting resistor. So that resistor had to be sized to allow the minimum required current for the VR tube (5mA in the case of the 0A2) + the maximum current for the nixie tubes. I was planning on drawing around 50mA, so I would need a resistor that limited the current to 55mA. However when all the nixie tubes are off, that would mean the 55mA would be flowing through the VR tube, which exceeds its maximum by 25mA. I suppose I could have used several in parallel, perhaps even one VR tube for each nixie tube! However there is the second issue:
- The regulated voltage that they establish is, at the most, 150V (different VR models have different maintenance voltages). Again, I could use two in series, but now we are getting a little ridiculous.
It was time to do some more research. The solution is to use the VR tube to produce a reference voltage and then construct a feedback loop that measures the difference between this voltage and the desired output voltage and adjusts the output to stay at the desired level. At a high level, it looks like this:
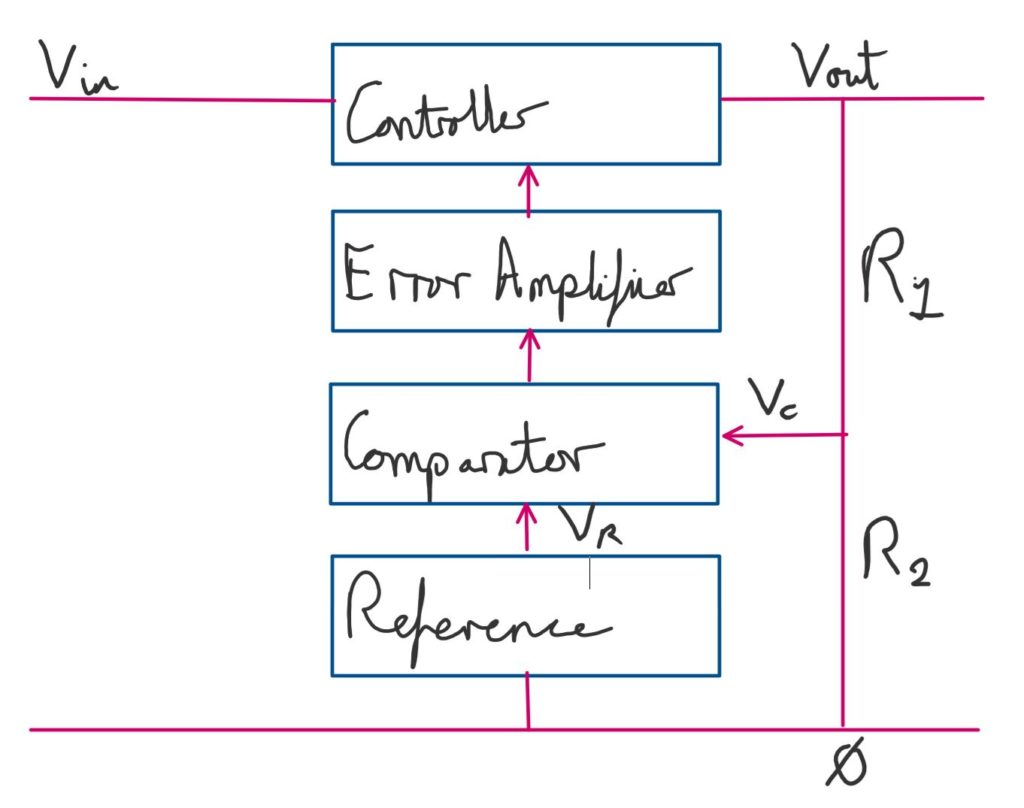
Together, the system tries to keep Vc equal to Vr, and therefore Vout constant, no matter what happens to Vin. Though there are limits to how much variation it can handle. In this system
And since Vc = Vr
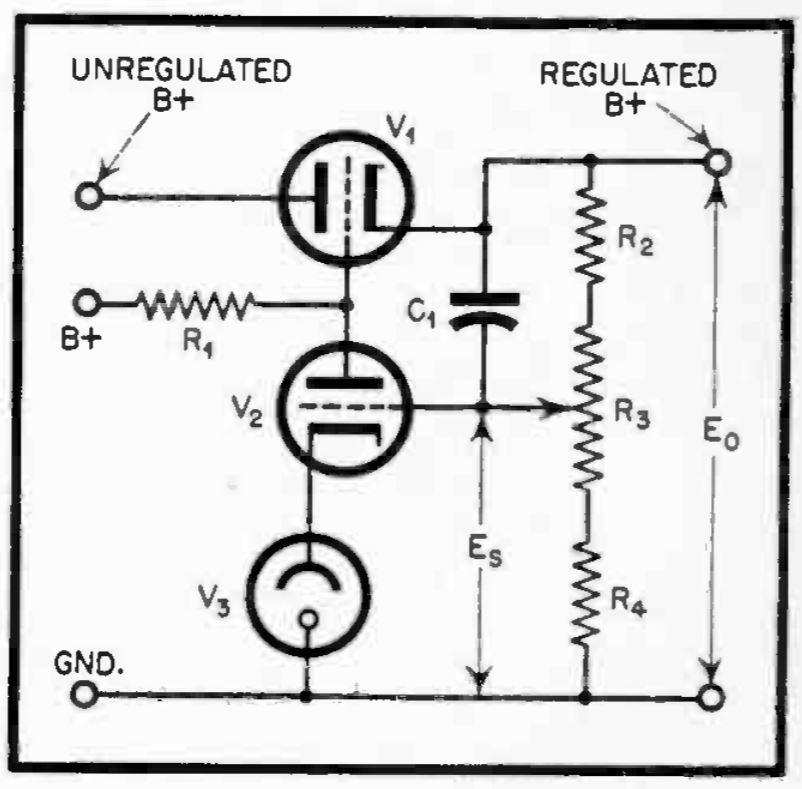
We have the reference voltage – it is a VR tube. What about the other three? The comparator and error amplifier are one device – in this case a triode. The controller (usually called the series pass tube, or just the pass tube, in this toplogy) could also be a triode. This diagram, from a 1947 issue of Radio magazine, illustrates the components nicely, leaving out various supporting resistors and capacitors:
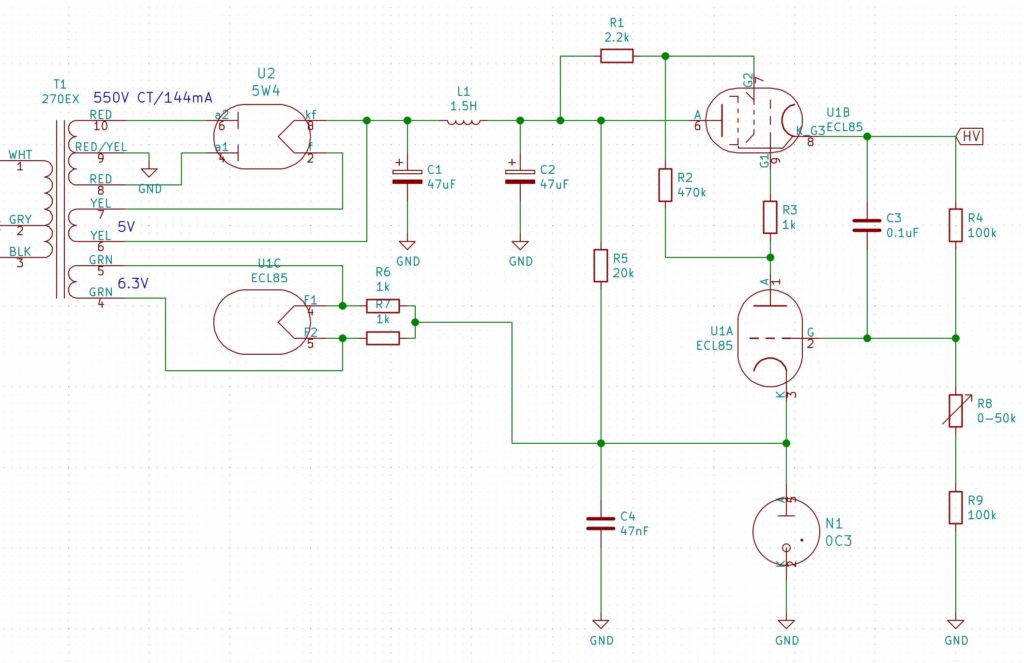
However, I will use a pentode for the pass tube, because I’m going to use a single tube that contains both a triode and a pentode – the ECL85 (aka 6GV8). The VR tube will be a 0C3, because it is a 108V VR tube and it looks nice!
As it turns out, the ECL85 also has a 6V3 heater, but it needs it to be at a potential that is within 100V of either cathode. That means I can’t use the same 6V3 transformer winding for both the ECL85 and the rectifier tube. In addition, there is significant voltage drop across the pentode and the whole thing will need more current to drive it, so it was time to look for both a new transformer and a new rectifier tube. I ended up going with the 5W4G, which still has a reasonable forward voltage drop and can handle the additional voltage and current. In addition it has a 5V heater which works well in this setup, because transformers that have one 5V and one 6V3 winding are more common than transformers that have two 6V3 windings. For the transformer, I settled on another Hammond, the 270EX.
The 5W4G has a directly heated cathode, unlike the 6CA4, which means that it is at the same potential as the cathode. So now I have a problem. Both the 5V and the 6V3 windings are at different potentials than the main secondary winding, which means I can’t use either of them for my 5V supply, at least directly, as my 5V supply needs to share a 0V rail with the main secondary. I’ll come back to this later – I want to talk about the control circuitry first. I’ll finish this post with the final circuit diagram of the power supply:
One Reply to “Nixie Clock With Vacuum-tube Power Supply – Part 3”